L'art du Témari ... Comment broder (suite) Temari’s Art….. How to embroider (follow up)
6) embroider all the in between sections right up to the 2nd tread of the starting point.
7) at the 1st starting point (yellow pin here) start to embroider with a herringbone stitch under the 1st tread just 1 or 2 mm LOWER the 1st stitch (at the bottom as well as the top.
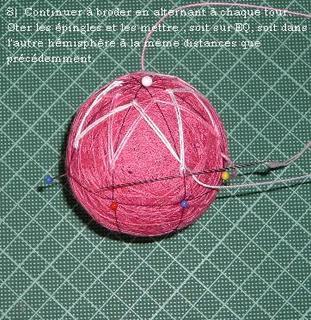
8) keep going with the same stitch changing colour each row. Change the pins accordingly
9) after a few rows, we have a plaid effect close to the NP and on the petals. As we are going closer to the equator the stitch look pointy. You can also change the colour on each petal or use a different colour, it’s up to you imagination.
Pour l’hémisphère Sud , retourner la Mari et procéder de la même façon autour du PS.
La prochaine fois, nous verrons comment terminer ce genre de motif en enroulant et rebrodant un « obi » autour de l’équateur.
Rendez-vous dans 10 jours … et pour patienter :
La prochaine fois, nous verrons comment terminer ce genre de motif en enroulant et rebrodant un « obi » autour de l’équateur.
Rendez-vous dans 10 jours … et pour patienter :
For the South hemisphere, put the Mari upside down and do the same as for the North hemisphere around the SP (South Pole) Next time we will see how to finish off that kind of motif in winding up and re-embroider an “obi” around the equator.Our next rendez-vous is in 10 days….. and to keep you waiting have a look here :


